Default Content Types Disappear when you Add a Content Type to a SharePoint Online Document Library

July 6, 2018

Well, this is an annoying one. I have a set of Document Libraries in SharePoint Online with the default Content Type set to Document (I.e. word document from a template point of view). Also available in the New menu are Excel, PowerPoint and OneNote.

spo - default content types

Then I add the Document Set content type to the list of available content types, but instead of having that additional content type the Excel, PowerPoint and OneNote “new” options disappear! Why?

spo - after document set content type added

Answer is here, but the summary is – content types are sourced from Office Online by default. If you add a content type, it stops using the default Office Online templates and it only uses the ones specifically configured for the Document Library – which in my case is just Document (Word) and the Document Set I added.

The fix: you have to create content types for Excel and PowerPoint, and then add those to the Document Library as well… more of a workaround actually. 😦


FIXING: The program ‘[5656] dotnet.exe’ has exited with code -2147450730 (0x80008096).

June 24, 2018

This error started appearing in my ASP.NET Core v2 web application after I upgraded to .NET Core v2.1.1 from v2.1.0. As soon as I pressed Run-Debug, the application console window would briefly appear then instantly disappear. The output in VS.NET 2017 said:

The program '[5656] dotnet.exe' has exited with code -2147450730 (0x80008096).

Not super helpful.

I changed the Project Properties for my project so the Debug, Launch property was “IIS Express” instead of “Project”, and when I tried to debug then I got the following output:

your.project> It was not possible to find any compatible framework version
your.project> The specified framework 'Microsoft.AspNetCore.All', version '2.1.1' was not found.
your.project> - Check application dependencies and target a framework version installed at:
your.project> C:\Program Files\dotnet\
your.project> - Installing .NET Core prerequisites might help resolve this problem:
your.project> http://go.microsoft.com/fwlink/?LinkID=798306&clcid=0x409
your.project> - The .NET Core framework and SDK can be installed from:
your.project> https://aka.ms/dotnet-download
your.project> - The following versions are installed:
your.project> 2.1.0 at [C:\Program Files\dotnet\shared\Microsoft.AspNetCore.All]

That makes much more sense! I had upgraded my project, but not my SDK. Not sure if its an early bug or not, but as soon as I installed the SDK and tried to debug my web app again it worked immediately.

FYI after installing the SDK I got the following proof:

wp-sdkinstall

HOWTO: Access the User Profile Synchronization Client in SharePoint Server 2013

April 19, 2018

This post is one of those “I used to know how to do this – where is that app again?!?” kind of posts…

User Profile Synchronization in SharePoint 2013 was great when it worked, and diabolical when it didn’t. The User Profile sync used the “RTM” version of the Forefront Identity Manager (FIM) profile synchronization engine, which is great but also a pain because it Never Got Updated – you got all the issues that the RTM version had, with none of the great fixes released later on.

Under the hood, you can access the FIM admin utility via the following default path:

C:\Program Files\Microsoft Office Servers\15.0\Synchronization Service\UIShell\miisclient.exe

If you can’t find the application there, open up the Local Services app and look for “Forefront Identity Manager Service”, and the “Path to executable” value is where the FIM application is installed.

WARNING: don’t make changes in this application! User Profile Synchronization is configured by SharePoint Server 2013 automatically, and making changes here will cause issues! Think of the MIISClient as a handy window into the workings of profile synchronisation…


SharePoint 2013 Cannot Install – This product requirements Microsoft .Net Framework 4.5

September 4, 2016

I have been building a new SharePoint 2013 farm for a client and was unable to install SharePoint 2013 binaries due to the following error:

This product requirements Microsoft .Net Framework 4.5

.NET 4.5 was installed, but it turns out that a recent patch had also deployed .NET 4.6.1 as well. The SharePoint 2013 setup doesn’t pick that up and fails with the message above.

Resolution: uninstall .NET 4.6.x via Add/Remove Programs, View installed updates, and located the KB reference for the version of the .Net Framework you want to remove. In my case it was KB3102467.

After uninstalling I could continue with the install.


SharePoint 2013 – Cannot activate Sandbox code solutions

September 4, 2016

We have a couple of sandbox no-code solutions in our Castlepoint product, and on a new SharePoint 2013 farm I could upload them but the Activate button wouldn’t enable.

Then I realised that I hadn’t started the Microsoft SharePoint Foundation Sandboxed Code Service yet… oops! Started the service on my application servers, and then when I tried to Activate the solution the button was enabled immediately.

Problems with SharePoint Designer 2013 and Check In Check Out Actions for Current Item

September 3, 2016

Problem – I want to check out the “Current Item” in my SharePoint Designer 2010 (using SPD2013) workflow, but the “Current Item” property isn’t available to select. I either have a blank list to choose from, or the lists in the root website to choose from. My workflow is associated with a site collection content type.

I had to use the a cached copy for the solution (original article here) so I’m re-printing it here. Following is the text from the original article:

The Requirement:

Create a workflow that will make field updates to a document or page that requires check-in / checkout. This workflow must be able to work on any page or document library in the site collection.

The Solution:

A modification to the .xoml file that tells the workflow to use “this item” regardless of the list.

Disclaimer: If you want to model an out of the box workflow, always copy and modify…it is never a good idea to modify the out of the box global workflows directly.

Steps:

  1. Set up your workflow with placeholders for your check-in and checkout actions.
  2. Add “Check out item in this list” and “Check in item in this list with Comment” actions to the appropriate steps on your workflow.
    1. Do not select a List. Leave the “this list” as is.
  3. Save your workflow.
  4. Go “All Files”, “Workflows”, click on the workflow name in the window below “All files” so that your workflow displays it’s files in the window on the right side of the screen.
  5. Right click on the .xoml file and click “Open With”, “SharePoint Designer (open as XML)”
  6. Save this file.
  7. Click on “Workflows” and click on the workflow name to open the workflow file as you normally would.
  8. Do not make any changes but click “Save”
  9. When Designer pops up to say that a different version of the .xoml file was saved, and politely asks if you want to replace that file with this one click “No”.
  10. Close Designer and re-open it
  11. Click on “Workflows” and click on your workflow to open and edit it.
  12. Find the step where you checked out and checked in the item.
  13. The action should say “Check out item in Current Item” and “Check in item in Current Item with comment: xxx


I’m not sure why you have to close Designer and re-open it before you can see your changes, maybe it’s just my wonky machine, but I have to follow these steps exactly on order for the change to “take”.

Notes:

Make sure that you do NOT have “end on change” feature turned on, or your workflow will stop immediately after making the change without checking the document back in.

HOWTO Fix Office Web Apps 2013 Unhealthy Status

June 14, 2016

This issue popped up in a recent deployment of Office Web Apps 2013. The machine status of Unhealthy was being reported when using the following commands on all machines in the farm:

$farm = Get-OfficeWebAppsFarm
$farm.Machines

Looking in the machine event log, the following entries related to OneNote was appearing:

WebOneNoteWatchdoc reported status for OneNoteMerge in category ‘Ping’. There was no endpoint listening at net.pipe://localhost/MergeService that could accept the message.

A quick bit of searching came up with the following:

https://social.technet.microsoft.com/Forums/office/en-US/295d925a-3e48-4f30-8555-3cd3e888d55c/office-web-apps-2013-unhealthy?forum=officeitpro

“Just wanted to re-confirm this was the answer. I had installed Office WA on:
D:\Program Files\Microsoft Office Web Apps\

unknown to me, one component had been created in:
C:\Program Files\Microsoft Office Web Apps\OneNoteMerge

This was generating the
“Exception while executing OneNoteMergeService Ping check” and “Health report by WebOneNoteWatchdog: Agent: OneNoteMerge, eventId: 1141″ in the ULS log files.

Copy OneNoteMerge folder to D drive folder and OWA now healthy (after a short delay). Definitely a bug for our dear friends at Microsoft to sort out.”

This fix worked for me as well – manually copying the OneNoteMerge folder from [C:\Program Files\Microsoft Office Web Apps] to [D:\Program Files\Microsoft Office Web Apps] followed by a reboot fixed my issue!

Changing SharePoint 2013 Site Collection URLs from Host-Named to Path-Based

September 4, 2015

Huge thankyou to Todd Klindt for saving me many many tears.

I have recently installed SharePoint 2013 August 2015 Cumulative Update, and one of the commands available as of the February 2015 Cumulative Update is the [site].Rename() method. This allows you to change the URL of your site from path-based (http://theweb/sites/myweb) to host-named (http://newweb.ishere). It’s a lot better than having to use Backup-SPSite and Restore-SPSite!

We had some databases that had been dismounted from their web application via Dismount-SPContentDatabase. I attached them to their new web application via:

Mount-SPContentDatabase -WebApplication http://the.webapp -Name DB_SiteCollection

This adds the content database to the web application and makes it available. In my case it became the “root” site collection as it was previously attached to a host-header web application (as opposed to a host-named site collection).

I then accessed the site via:

$db = Get-SPContentDatabase DB_SiteCollection $site = $db.Sites[0]

Renaming the site first of all using:

$site.Rename(“http://new-hnsc-url”)

Gave me the following error:

Exception calling “Rename” with “1” argument(s): “Content database does not support renaming to and from host header site collections. Please upgrade content database to version ‘|0’.”

Oops! Forgot to upgrade it! No problem, just using the command:

Upgrade-SPContentDatabase -WebApplication http://the.webapp -Name DB_SiteCollection

Fixed up the version of the content database, then tried my rename command again. This time I got:

Exception calling “Rename” with “1” argument(s): “Cannot rename a site collection with recycled items. Empty the site recycle bin of site collection http://new-hnsc-url and retry.”

OK that makes sense. Recycle bin content would be pointing to different URLs after a site rename. Not sure why recycle bin content can’t be updated at the same time but whatever:

$site.RecycleBin.DeleteAll()

and then the previous $site.Rename() magic worked perfectly. That’s days of work saved thanks to a nice new function.

HOWTO Debug SharePoint 2013 REST Calls in Workflows

August 21, 2015

I am creating SharePoint 2013 workflows using SharePoint Designer 2013 that makes web service calls to the various SharePoint 2013 REST APIs.

The REST URL format is slightly confusing for new users, so I am documenting how I uncovered various methods here and what you can do to debug REST calls in SharePoint 2013. My principal tool for debugging is the Fiddler web debugging tool.

Creating a Request in Fiddler

I am using the Composer function to create URLs to call REST APIs in SharePoint 2013. This allows me to set the HTTP method (GET, POST, UPDATE, MERGE, etc), the URL, and watch the response from the server.

Testing the URL Path

REST URL requests are very specific in the path for the requrement. Here is an example:

HTTP GET – http://myurl/sites/abc/_api/web/

This REST url returns the properties of the web located at http://myurl/sites/abc/, and also provides a list of the next level objects available to call via the API. You can get the Current User information via the REST api by using:

HTTP GET – http://myurl/sites/abc/_api/web/currentuser

This should return details about the Current User as per the user profile in your SharePoint environment.

Here is another example for the GetFileByServerRelativeUrl:

HTTP GET – http://myurl/sites/abc/_api/web/GetFileByServerRelativeUrl(‘/sites/abc/Library1/my.docx’)

This REST url has a number of different elements.

  1. The site is used to access the web api (_api/web)
  2. The api method (GetFileByServerRelativeUrl) is used to access an SPFile
  3. The server relative url is required for this particular method call

Getting the Context Info

The Context Info is a mechanism for SharePoint to ensure users aren’t tricking into calling SharePoint without their knowledge. You can use Fiddler again to view your context info:

HTTP POST – http://myurl/sites/_api/contextinfo

Your return result will include the context element d:FormDigestValue, and this value can then be passed in via headers to web service calls using the header “X-RequestDigest”.

Common Errors

HTTP/1.1 403 Forbidden

The REST API call may not have the correct X-RequestDigest (see previous Getting the Context Info section). You can view more detail via Fiddler when you click on the “TextView” tab. Look for “The security validation for this page is invalid. Click Back in your web browser, refresh the page, and try your operation again.”

HTTP/1.1 405 Method Not Allowed

The REST API call accepts particular HTTP method(s) (like GET, POST, UPDATE etc). Try changing the HTTP method (eg from GET to POST).


HOWTO Fix SharePoint 2013 and Workflow Manager Configuration

August 14, 2015

The configuration and integration between SharePoint 2013 and Workflow Manager is hard. Really hard – when it doesn’t work straight away. Workflow Manager is a stand-alone product, integration between SharePoint and WM is all done via PowerShell, diagnosing issues between WM and SharePoint is problematic, and there doesn’t seem to be a concrete method to guarantee it will work. Many articles say “just rebuild your SP farm and/or Workflow farm”. Ouch.

Let’s work backwards to solve the problem. SharePoint Designer 2013 is looking for two configuration items to be completed before it will let you create SharePoint 2013 workflows.

  1. The Workflow service proxy is configured and working (via Central Admin)
  2. The Workflow Service feature is configured and working (via PowerShell)

Both of these components must be enabled and functioning in order to tick the boxes in SharePoint Designer 2013. If either fails, SharePoint Designer will not allow you to create SharePoint 2013 workflows.

The Workflow service proxy (1) connects to the Workflow services system. The Workflow Service feature (2) is a SharePoint feature that must be enabled and configured via SharePoint Powershell for the site collection. Lets got through all the components.

Checking Workflow Manager Service Configuration

Use the following Workflow Powershell commands to view the server configuration:

Get-WFFarm | format-list

This should return the following:

RunAsAccount      : <hostname>
AdminGroup      : <hostname>
HttpPort      :    12290
HttpsPort    :    12291

Endpoints   : <https://my.workflow.url:12290&gt;

You should be able to use your browser to access the Endpoint and return an Xml configuration page.
To get the Farm status use:

Get-WFFarmStatus | format-list

This should return the following:

HostName      : <hostname>
ServiceName   : WorkflowServiceBackend
ServiceStatus : Running

HostName      : <hostname>
ServiceName   : WorkflowServiceFrontEnd
ServiceStatus : Running

The ServiceStatus “Running” is the important part here.

Checking SharePoint 2013 Workflow Service Configuration

Use the following SharePoint 2013 powershell commands to view Workflow Service configuration:

Get-SPWorkflowConfig -SiteCollection [sitecollectionurl]

Get-SPWorkflowServiceApplicationProxy | format-list

Validate that the Endpoints are correct, and you can indeed navigation to them.

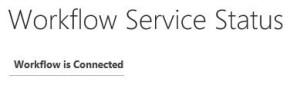
Checking SharePoint 2013 Workflow Proxy Application

The workflow proxy application is available through the Central Admin, Manage Service Applications interface. Clicking on the Workflow service application should show you the following:

Workflow - Service Application Proxy Status

Fixing SharePoint 2013 Workflow Service Feature

The following SharePoint Powershell command forces the Workflow Service feature to be enabled:

Enable-SPFeature -Identify WorkflowServiceStore -url <site collection url> -Force

I received this error when I didn’t use the -Force parameter:

Enable-SPFeature: The field with id {GUID} defined in feature {GUID} was found in the current site collection or in a subsite.

SharePoint 2013 CU2 Upgrade Issues with Workflow Manager

During a recent upgrade of our SharePoint farm I noted the following warning in the upgrade log file:

WARNING Error UpgradeWorkflowServiceActivities.  
Run Copy-SPLocalActivitiesToWorkflowService manually to complete this action.  
Error: Microsoft.Workflow.Client.WorkflowEndpointNotFoundException: Unable to connect to the remote 
service at http://<servername>:12291/SharePoint/. See InnerException for more details.

It turned out that during the upgrade the IIS service was offline, so the workflow management endpoint was also offline. There doesn’t actually seem to be a Copy-SPLocalActivitiesToWorkflowService powershell command, but there is a Copy-SPActivitiesToWorkflowService. I ran that command with the following details (i’m using HTTP in my test environment):

$cred=[System.Net.CredentialCache]::DefaultNetworkCredentials
Copy-SPActivitiesToWorkflowService -WorkflowServiceAddress "http://<servername>:12291/SharePoint" -Credential $cred -Force $true

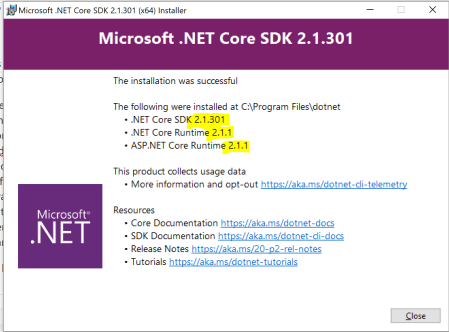
Addendum: Workflow Manager and Service Bus CU2

Service Bus 1.0 Cumulative Update 2 (CU2)

Workflow Manager 1.0 Cumulative Update 2 (CU2)